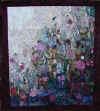
"Ozark Garden": Lesson 1
You really can't make this quilt wrong--and I'm sure that some of you are saying, "Yeah, right!" I told my guild members this when we passed out the packets of fabrics and patterns and many of them didn't believe me either. But I do mean it and you may get tired of hearing me say it. All blocks made by guild members had to "audition" for a place in the quilt. My favorite block didn't make it because the quilt refused it--and I was doing the arranging for the big quilt. Some of the extra flowers became part of the show ribbons and the rest of the blocks were made into small "sample" quilts for promotional purposes. These small quilts tickle me no end. The fabrics and colors are OK, but don't always reflect the "right" arrangement of light and dark. One block is even upside down! But if you didn't know how it was "supposed" to be, you'd never guess. This is a very forgiving project, so just relax and enjoy it. There is a list of trouble shooting tips at the end of Lesson One, but do try to figure it out for yourself first if you run into a problem--your solution may be better than mine! Here is a list of the lessons, what you will learn and a small image of the blocks for each one. You may make all of the blocks or only one, and as many of each as you choose (or have time and fabric for.) There will always be another possibility you could try.
You will find all the patterns for this class and directions for downloading and printing them here. Feel free to race ahead of the lessons and experiment on your own if you wish. Lesson One:


Lesson Two
Lesson Three
Lesson Four Class Two, which will begin January 15, 2001, will continue with three blocks that make different stems of hostas, two blocks for creating the illusion of water, a complex block that creates a cluster of small flowers and another hummingbird pattern. You will also have directions for two more wall hangings as well as suggestions for the full size quilt if you choose to make it. Let's get started.
Next |


