Labyrinth MazesThese directions are for Windows Paint TM, but can be applied to other graphics programs, or done with pencil and paper.
| |
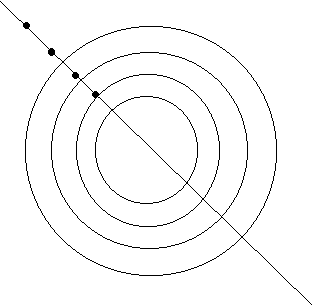
| Step One: Construct the Foundation One way to do this is to draw a set of concentric (same center) circles or other shapes. To draw concentric circles in windows Paint you need to start from a corner. This shows you a neat trick to keep your shapes concentric. Use the dots on the diagonal line as click points for drawing the circles, and then erase the line and dots.(Right Click and save this image to disk, if you wish, then open in Paint) |
 |
 |
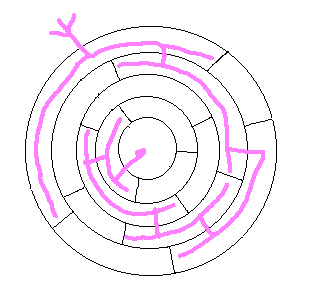
Step Two: Complicate the Foundation Using the line tool, subdivide each layer into random sections. |
| Step Three: Make the Solution Using a second color, as you did in Exercise One, trace a wandering path through the "corridors". (Don't worry if your lines are shaky--you are just playing here.) Note that in this case it is helpful to show that there is a choice to go either direction when you enter a new section. If you wish to save the solution, save the file now with a new name, and then return to the original file. |
 |
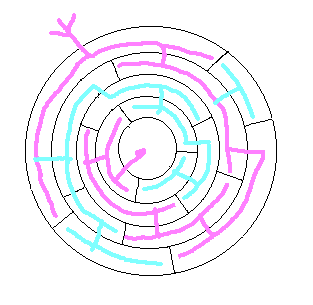 |
Step One: Complicate the Solution With a third color, trace alternate paths. Note that at one point, I allowed the path to cross one of the short cross walls. Set your own rules and give some thought to where you make the change of direction in order to create a maximum number of choices. |
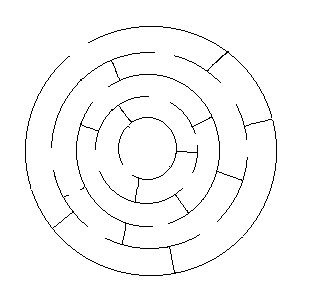
| Step One: Complete the Maze One at a time, fill your colored lines with white (quicker than erasing) and then erase a slightly wider opening where each line had crossed a wall. To make a quilt from this, create the "walls" with bias strip applique or satin stitching. |
 |
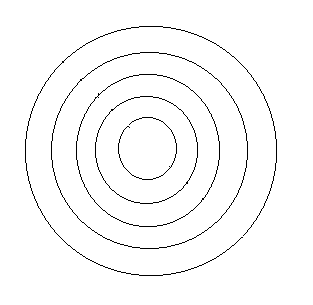 |
This image (left) may be saved or printed if you need it as a starting point. |
|
Other Design Sources
| |
|
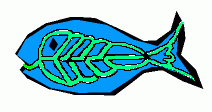
If you have a more sophisticated graphics program (like CorelDraw) that allows resizing an image, you could use a piece of clip art and paste in successively smaller images, add a set of concentric shapes as in the coffee cup at right, or insert any other type of maze line.
If you wanted to make a quilt from these designs, use applique and/or reverse applique for either of these styles.
|

 |
Next: "Hose" Mazes