Tiling Fabric Scans
If you use EQ4 and the Designer Fabric Libraries or the new Stash Cd, you have probably discovered that some of the fabric scans have annoying discontinuities (mismatches) when used as a fill for large areas. One of my favorites--Benartex's Impressions--is especially bad in this respect.
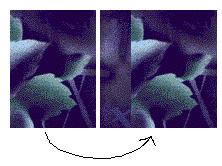
Compare the two fills below. The one on the left is the one included with your EQ4. The one on the right has been modified in Windows Paint. Neither one is an accurate rendition of the original fabric, but if the visual effect of your EQ4 quilt image is important, I much prefer the one on the right.
Directions for making this modification are given below.
The problem with the tiling arises because the scan did not include the complete repeat of the fabric. "Skooting" the fabric in the block may improve the block's appearance, but does not solve the problem in the EQ quilt image itself.
(These directions are for EQ4 users, but may be applied to any image you want to tile evenly.)
To make a better tiling image do the following steps.
- Make a one block quilt in EQ4 and fill it with the fabric that tiles awkwardly. Very carefully, select (camera tool) one repeat and copy it to the clipboard.
- Open Windows Paint or other graphics program and paste in the image.
- If you can see extra portions around the repeat, carefully select and delete those areas.
 
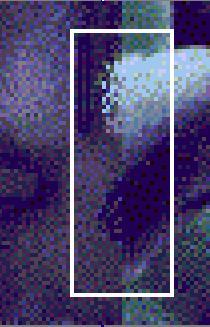
- Move the image to the lower left area of your screen. Starting from the left edge, carefully select a section of the image that is approximately 1/4 to 3/4 of the total image. Immediately move the selected area to the right and fit it against the right edge of the original image.
If a white line shows between the sections, undo and reselect more more closely to avoid picking up any of the background color.
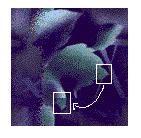
- Now the fun begins. Zoom in on the image (magnifying glass). Use the eyedropper tool to select colors and paint with a single pixel pencil to make a transition where there is an abrupt color change. Randomly dot in matching colors as in the enlarged image below.
 Use your undo (Control + Z) as needed. Zoom back out occasionally to see if the effect is adequate.
-
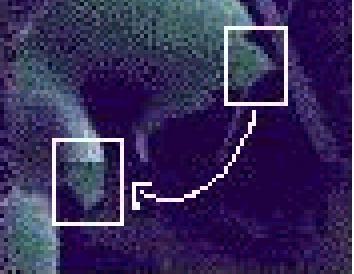
In some cases you can copy a small section, paste and immediately, without clicking anywhere else, move it into another position. In the example below a small section of leaf tip has been copied, pasted, rotated, and then moved into position. Some painting will be needed to blend the new area. The goal is to hide any abrupt changes.
- We have now camouflaged the vertical discontinuity. To disguise the horizontal mismatch, repeat the process, moving a portion of the bottom and fitting it at the top.
This repair process works because you have moved the non-matching outer edges to the center of the tile. The new outer edges have been cut and moved from each other and will match when tiled.
Not all fabric scans will repair as easily as this one does and none of the re-done images will match the fabric perfectly. But in some cases you may find it worth the effort.
A more sophisticated graphics program, such as PhotoShop or Painter, can create perfectly tiling images with less work.
|
 The Modified Tile