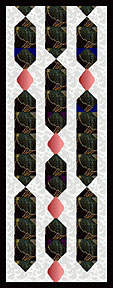
String of Beads
Make this strippy quilt as a quick-piece project or a scrappy "one bead at a time, finish whenever" undertaking. To download an EQ4 zipped file, click hereCopyright © 2000 Lily M. Kerns Okay, before we go any farther, let's look at this little "String of Beads" wall hanging. What could you change about this? Number? Size? Arrangement? Kind of beads? What else? What kind of changes could you make?
|
 |
We're going to something like that in this class. In Lesson One, you will design your beads and, in Lesson Two, you will string them and complete this versatile project as a wall hanging or table runner, as a bead "fringe" or scallop border, or as a full size quilt. It would also make a versatile vertical emphasis for wearables.
The directions are for a small "bell pull" style wallhanging, but you may adapt it as you choose. The directions will assume that you already have basic quilt making skills, but if there is something you don't understand or haven't yet learned to do, please don't hesitate to ask. Your question may be just the thing that someone else needed to know but was too shy to ask.
Supplies
Usual machine piecing supplies
Rotary cutter, mat and ruler
Fabric:
You can make the beads all of scraps, make them random, matching or coordinated, and add metallics or other fancy fabrics if desired. My personal favorites are prints with a gold line overprint, which will resemble cloisonne beads.
You will need a solid or subtle print for the background, preferably quite dark or rather light, plus borders, backing, batting and binding. To get started, muslin and scraps will be fine.
Now for the fun.
NEXT