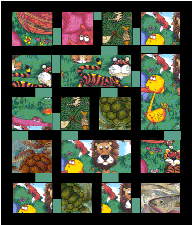
Zoo Time
Copyright © 2000 Lily M. Kerns
| The maze for this quilt is formed in the sashing strips, leaving larger "rooms" available for theme fabric. If you are a beginner and need more help with any of these steps, be sure to ask in the Discussion area for this class. You might also check in the library to see if the information you need is there, but be sure to ask if you need help. If you have EQ4, you may download a zipped .pj4 file (15K) which includes blocks for lessons 2-4. |
 |
Planning the Quilt
It pays to pre-plan this quilt. Because you will probably be using a directional fabric for background, i.e. "rooms and doorways", the sashing strips will need to be made with that in mind (directions follow). Print out a sample layout or construct your own on graph paper.
| Step One: Make the Solution The sashing strips will be made in three sections as you will see in the diagram at right. Any of these sections may be used as a doorway, but for more design control, plan to use only the end sections. |
 |
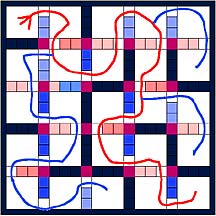 |
Wander through the maze as you did in Lesson One, then add alternate paths. Remember, this diagram is only a sample. There are many other possibilities. |
|
Step Two: Plans for Sashing Color in all unused sashing sections, as in the diagram above. I chose to color code them by the position of the doorways to make counting them easier. Remember, you will probably be working with a directional fabric. If not then you will need only one set of sashings, plus some plain strips. Note: In the Zoo quilt above, if you look closely, you will see that I chose to make three rooms double, i.e. no sashing fabric between them, to accomodate the fabric images. (Don't forget to allow for the sashing measurement when figuring this block size.) Keep this possibility in mind as you plan your quilt.
Step Three: Cutting the Fabric Theme fabric: you may simply cut the fabric in 6 1/2" squares (6" finished) or fussy cut each square. Now go on to the directions for making the sashings and completeing the quilt. |
Lesson One
Lesson Two
Lesson Three